Good Photographs Make for Great Digital 3D Models
A photographer circles the ritual seat for a noble (Osa' osa), taking pictures of it from all angles, while a friend ensures that she doesn't bump into people or other objects.
«In my last post, I introduced some of the work we're doing at the Museum with 3D scanning, modeling, and printing. I hope I piqued your interest in photographing objects in the galleries and turning those images into digital 3D models for use in your own artistic creations. Today I'm going to talk about the photography process: how to get the best images for use with the 3D-modeling program 123D Catch, and how to take pictures of an object without putting it at risk of unintended contact.»
The following tips and best practices should help you photograph objects safely and get some great images for use with 3D-modeling software:
1. Know the photography policy. Before you head off to your chosen museum, make sure you understand the institution's rules and guidelines about photography. Some museums don't allow photography at all, while others may allow it only in their permanent collection or for objects in the public domain. Some museums allow you to bring tripods if you get permission in advance, and there may be a different set of rules if you want to record video. You can usually find this information somewhere on the museum's website; ours is here.
2. Bring a friend. When possible, bring a friend, classmate, or relative when you go to photograph an object. Since you'll be focused on the piece, it's good to have someone else on hand as a "spotter" to make sure you don't bump into other people or (gasp!) other objects.
3. Choose your artwork. Make sure to find one with space around it so that you can photograph it from multiple angles. If the piece is up against a wall, accept that you might not be able to get all the way around it.
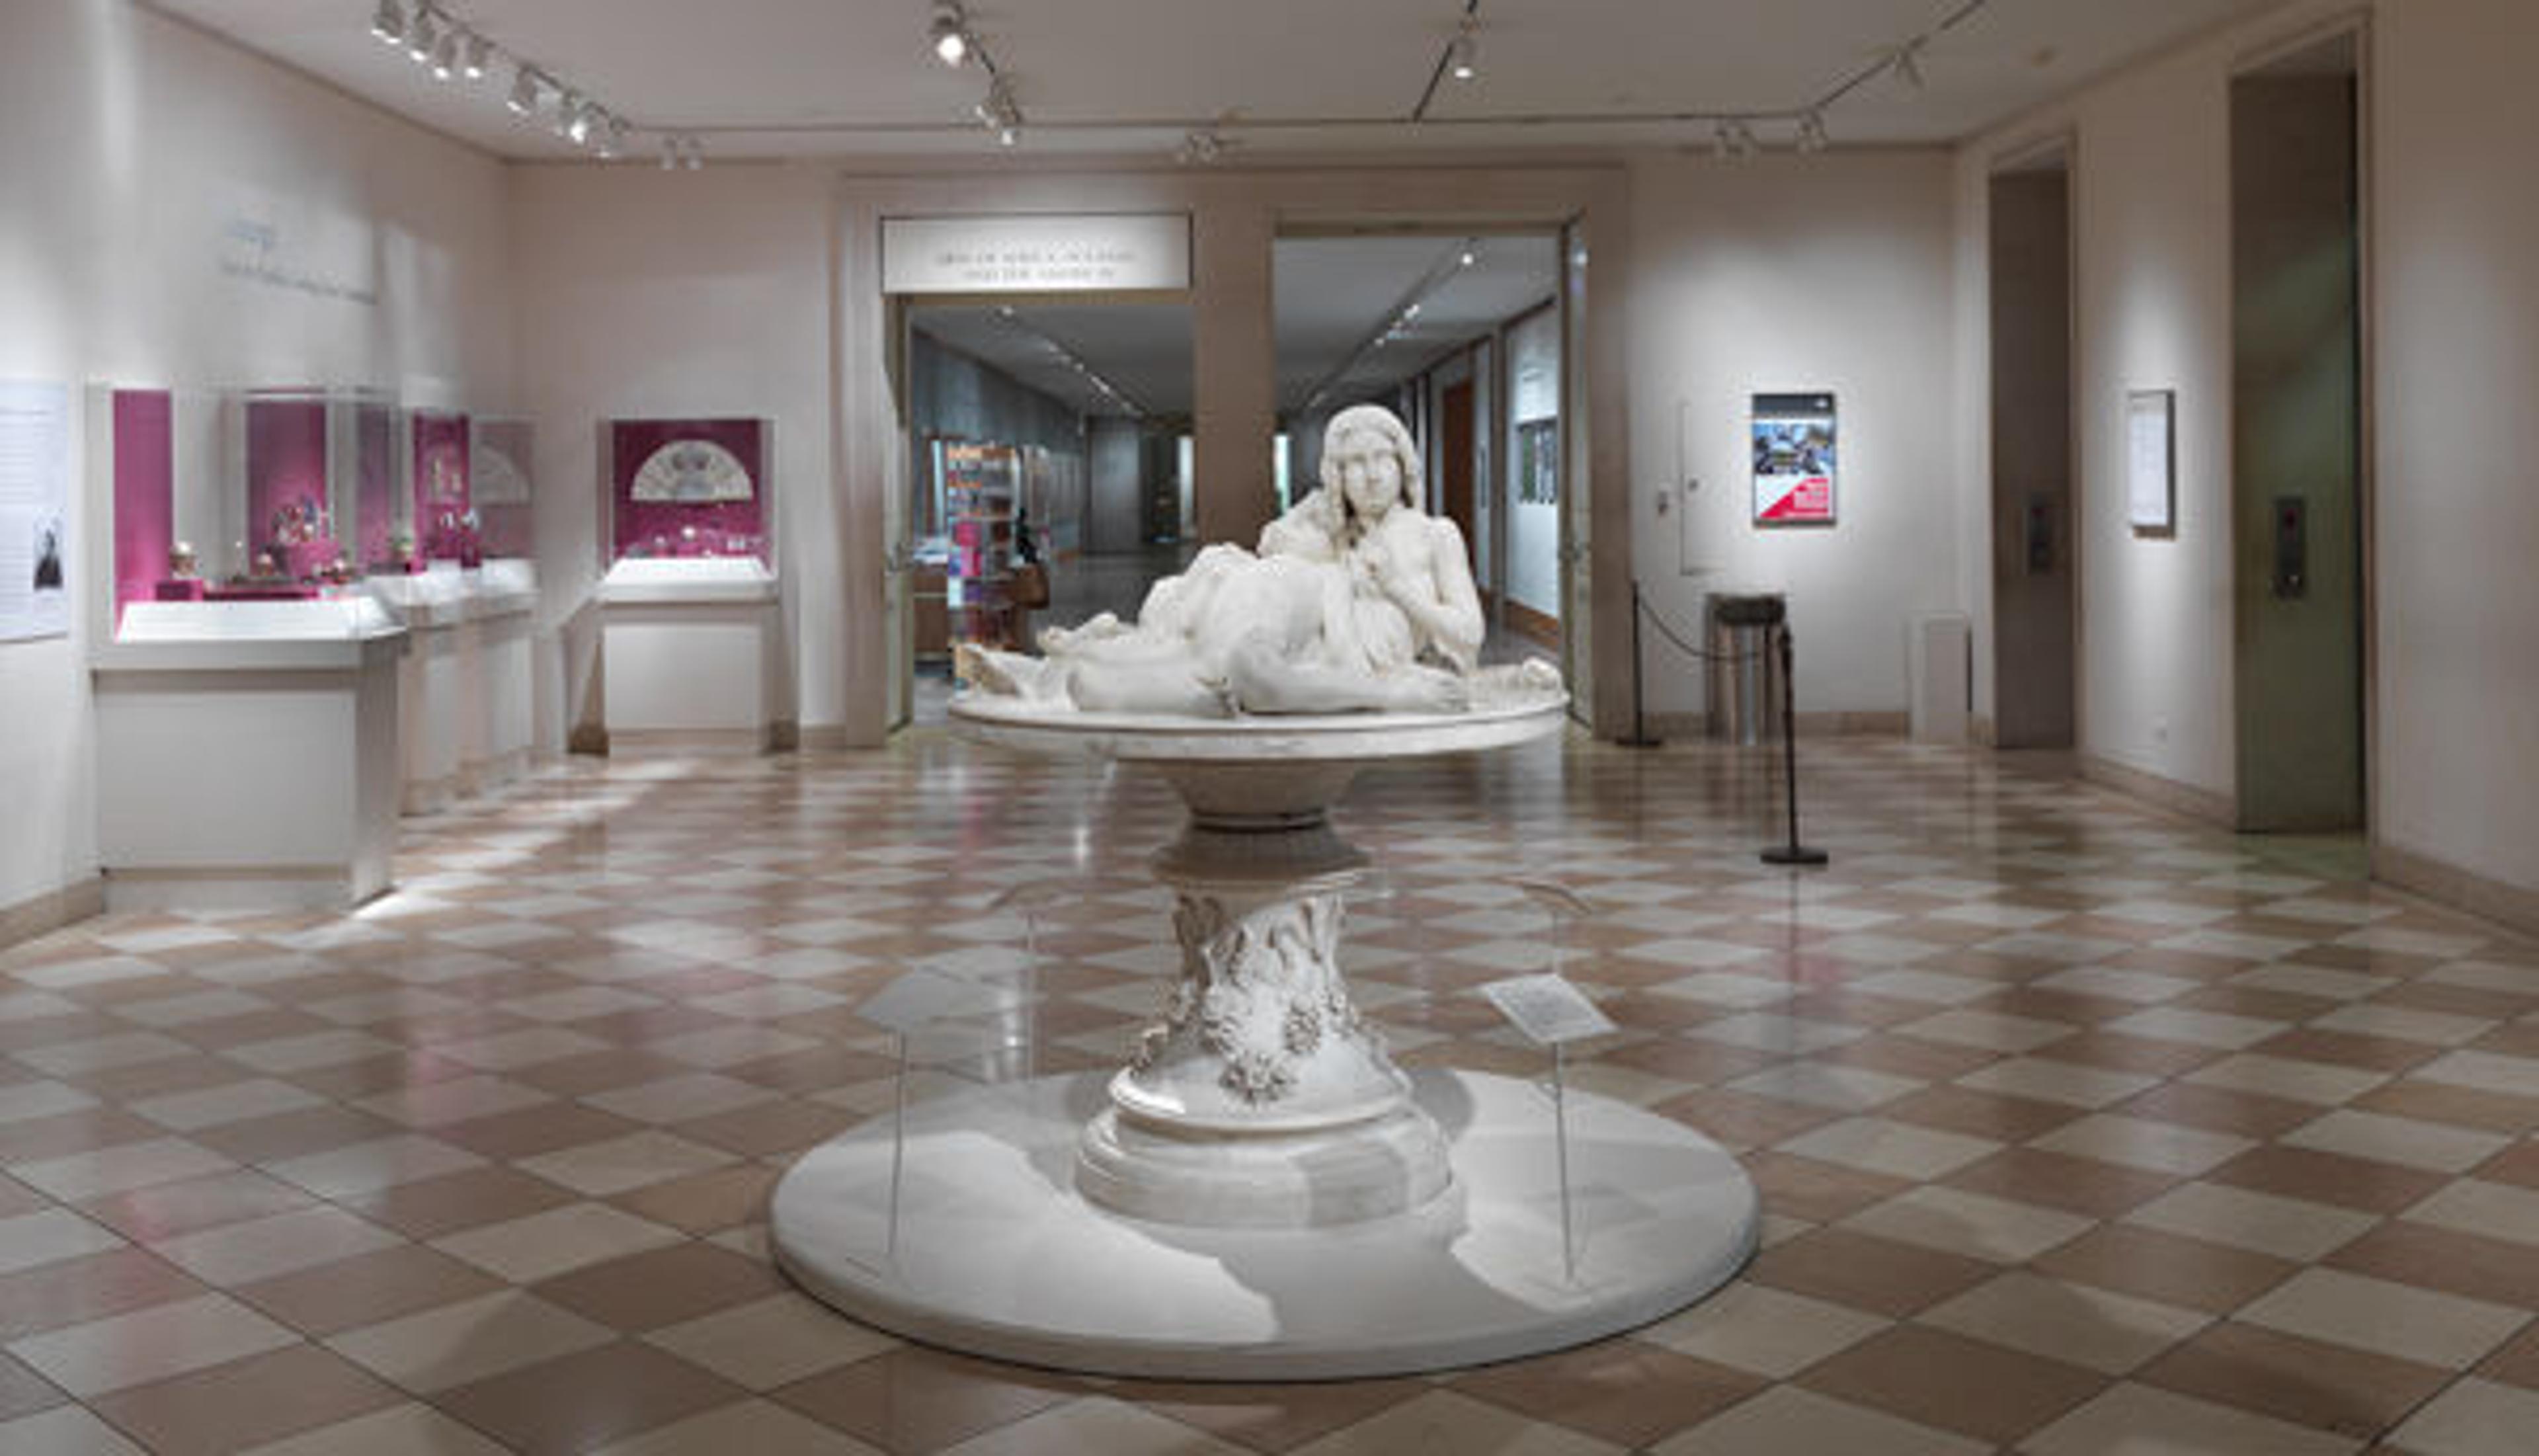
The Demidoff Table in gallery 555 would be easy to photograph from all sides.
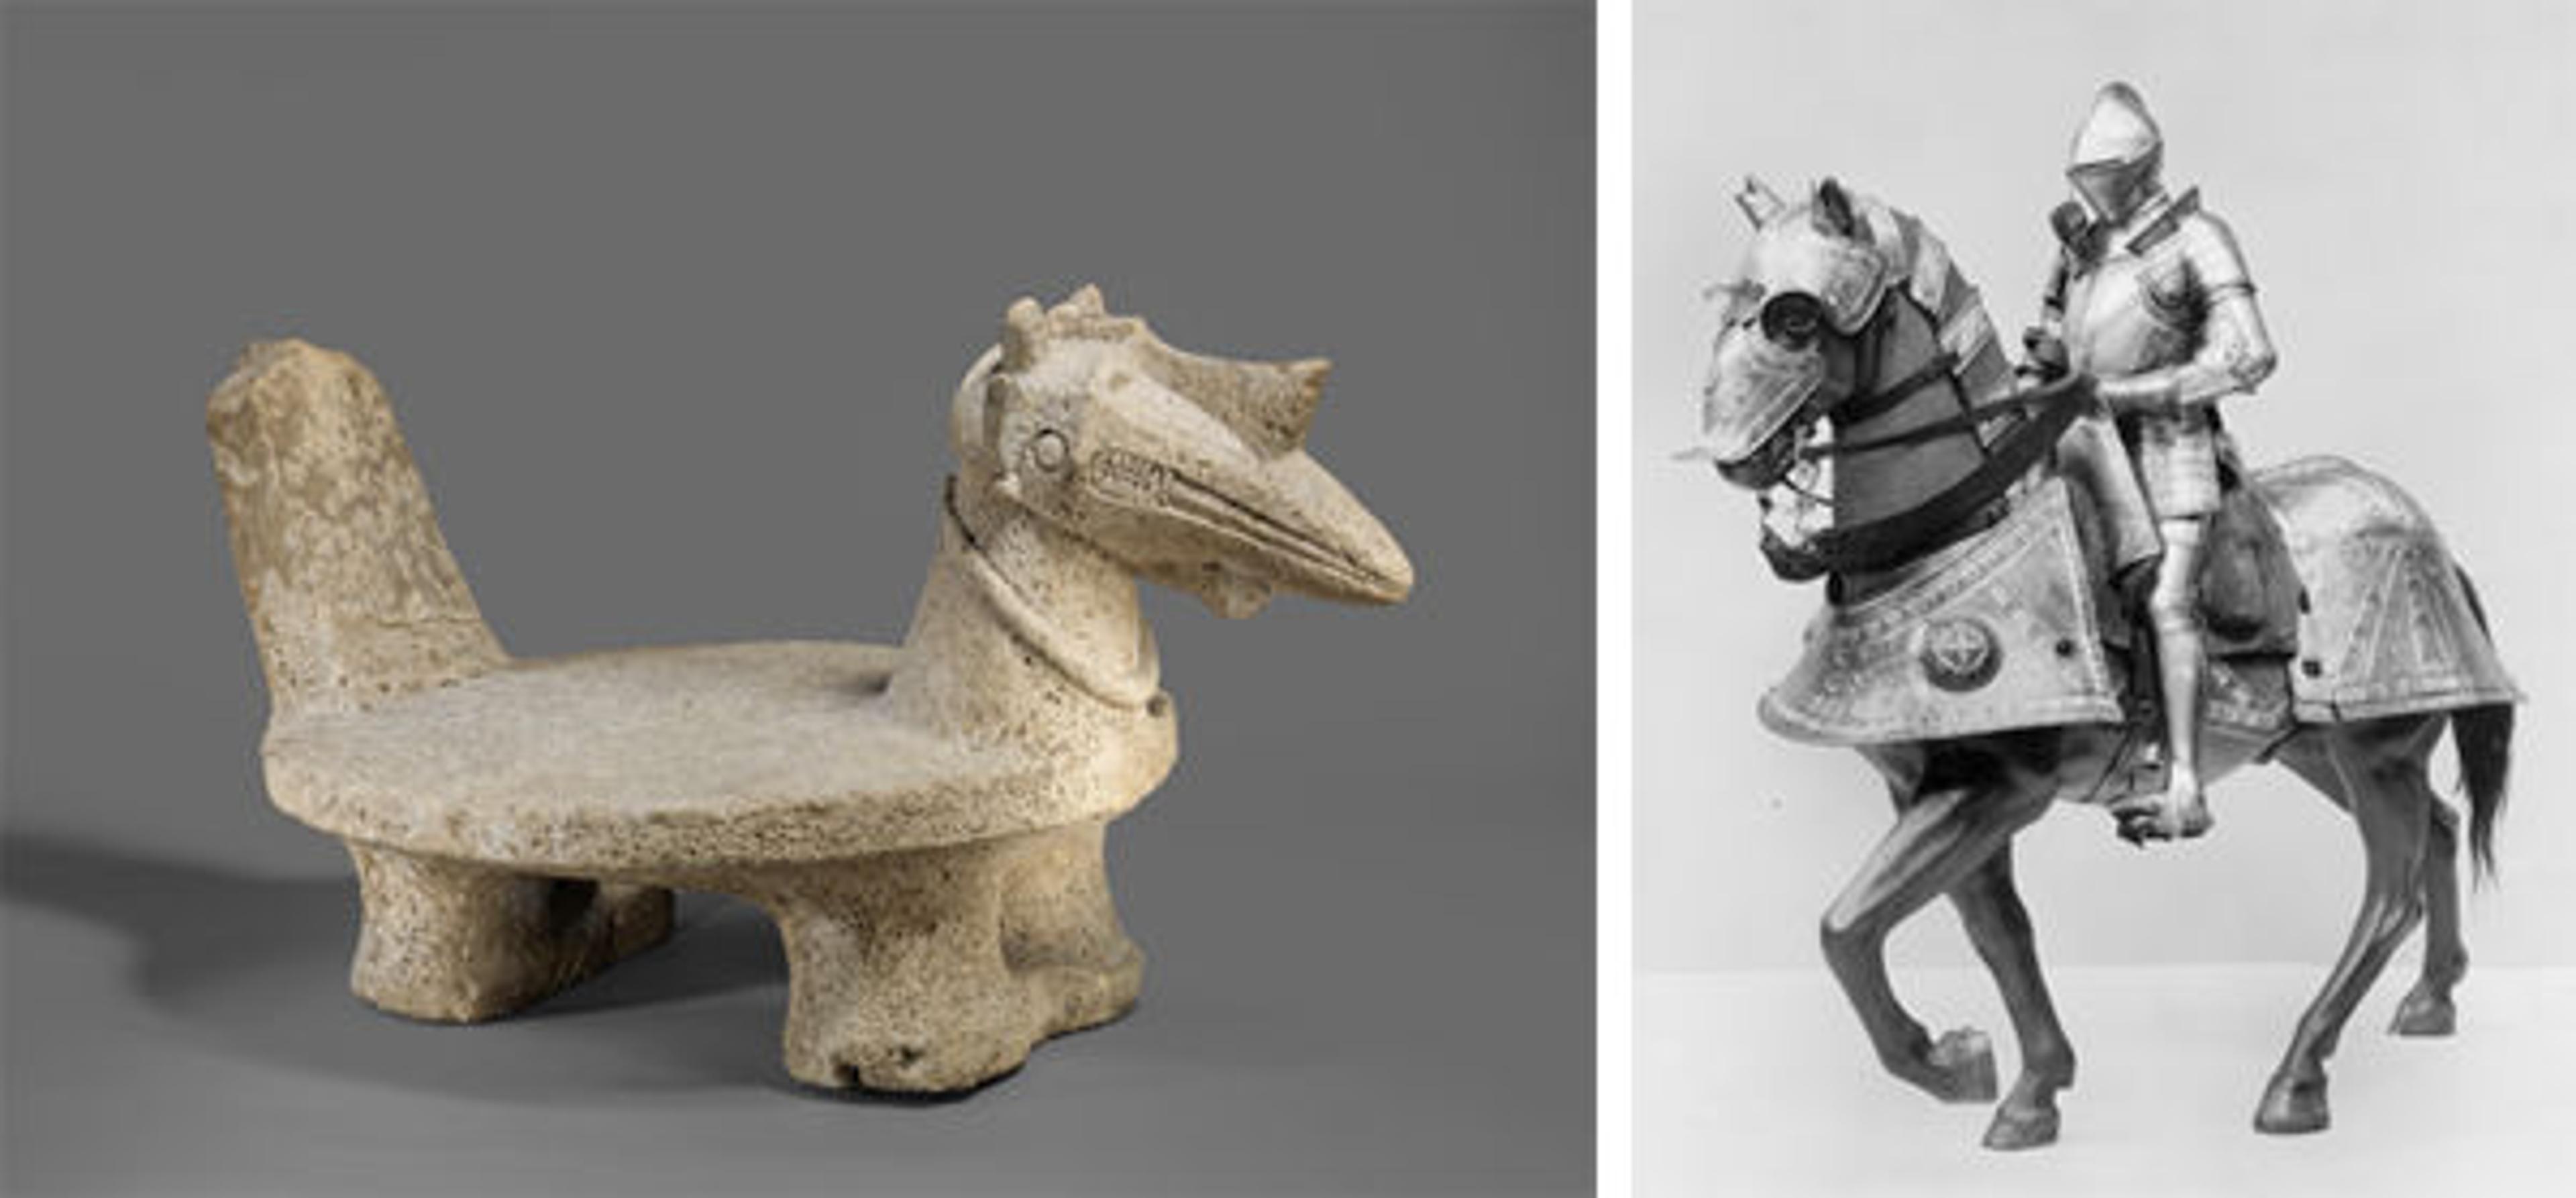
Objects made from nonreflecting materials such as marble, stone, wood, or other organic materials are the best candidates for photogrammetry. Photographs of shiny materials such as bronze, glass, and metal will confuse 3D-modeling software and prevent it from getting a good image of your object.
Left: The rough, stone ritual seat for a noble (Osa' osa) is a great candidate for 3D scanning. Right: Objects like this armor for man and horse are reflective, making them difficult to scan.
Objects in glass cases can be problematic for the same reason. But here's a tip: as long as you get the okay from a guard, you can fold a piece of paper into a cone, put the wide end up against the glass, and put the lens of the camera into the small end. Your shot won't have any glare!
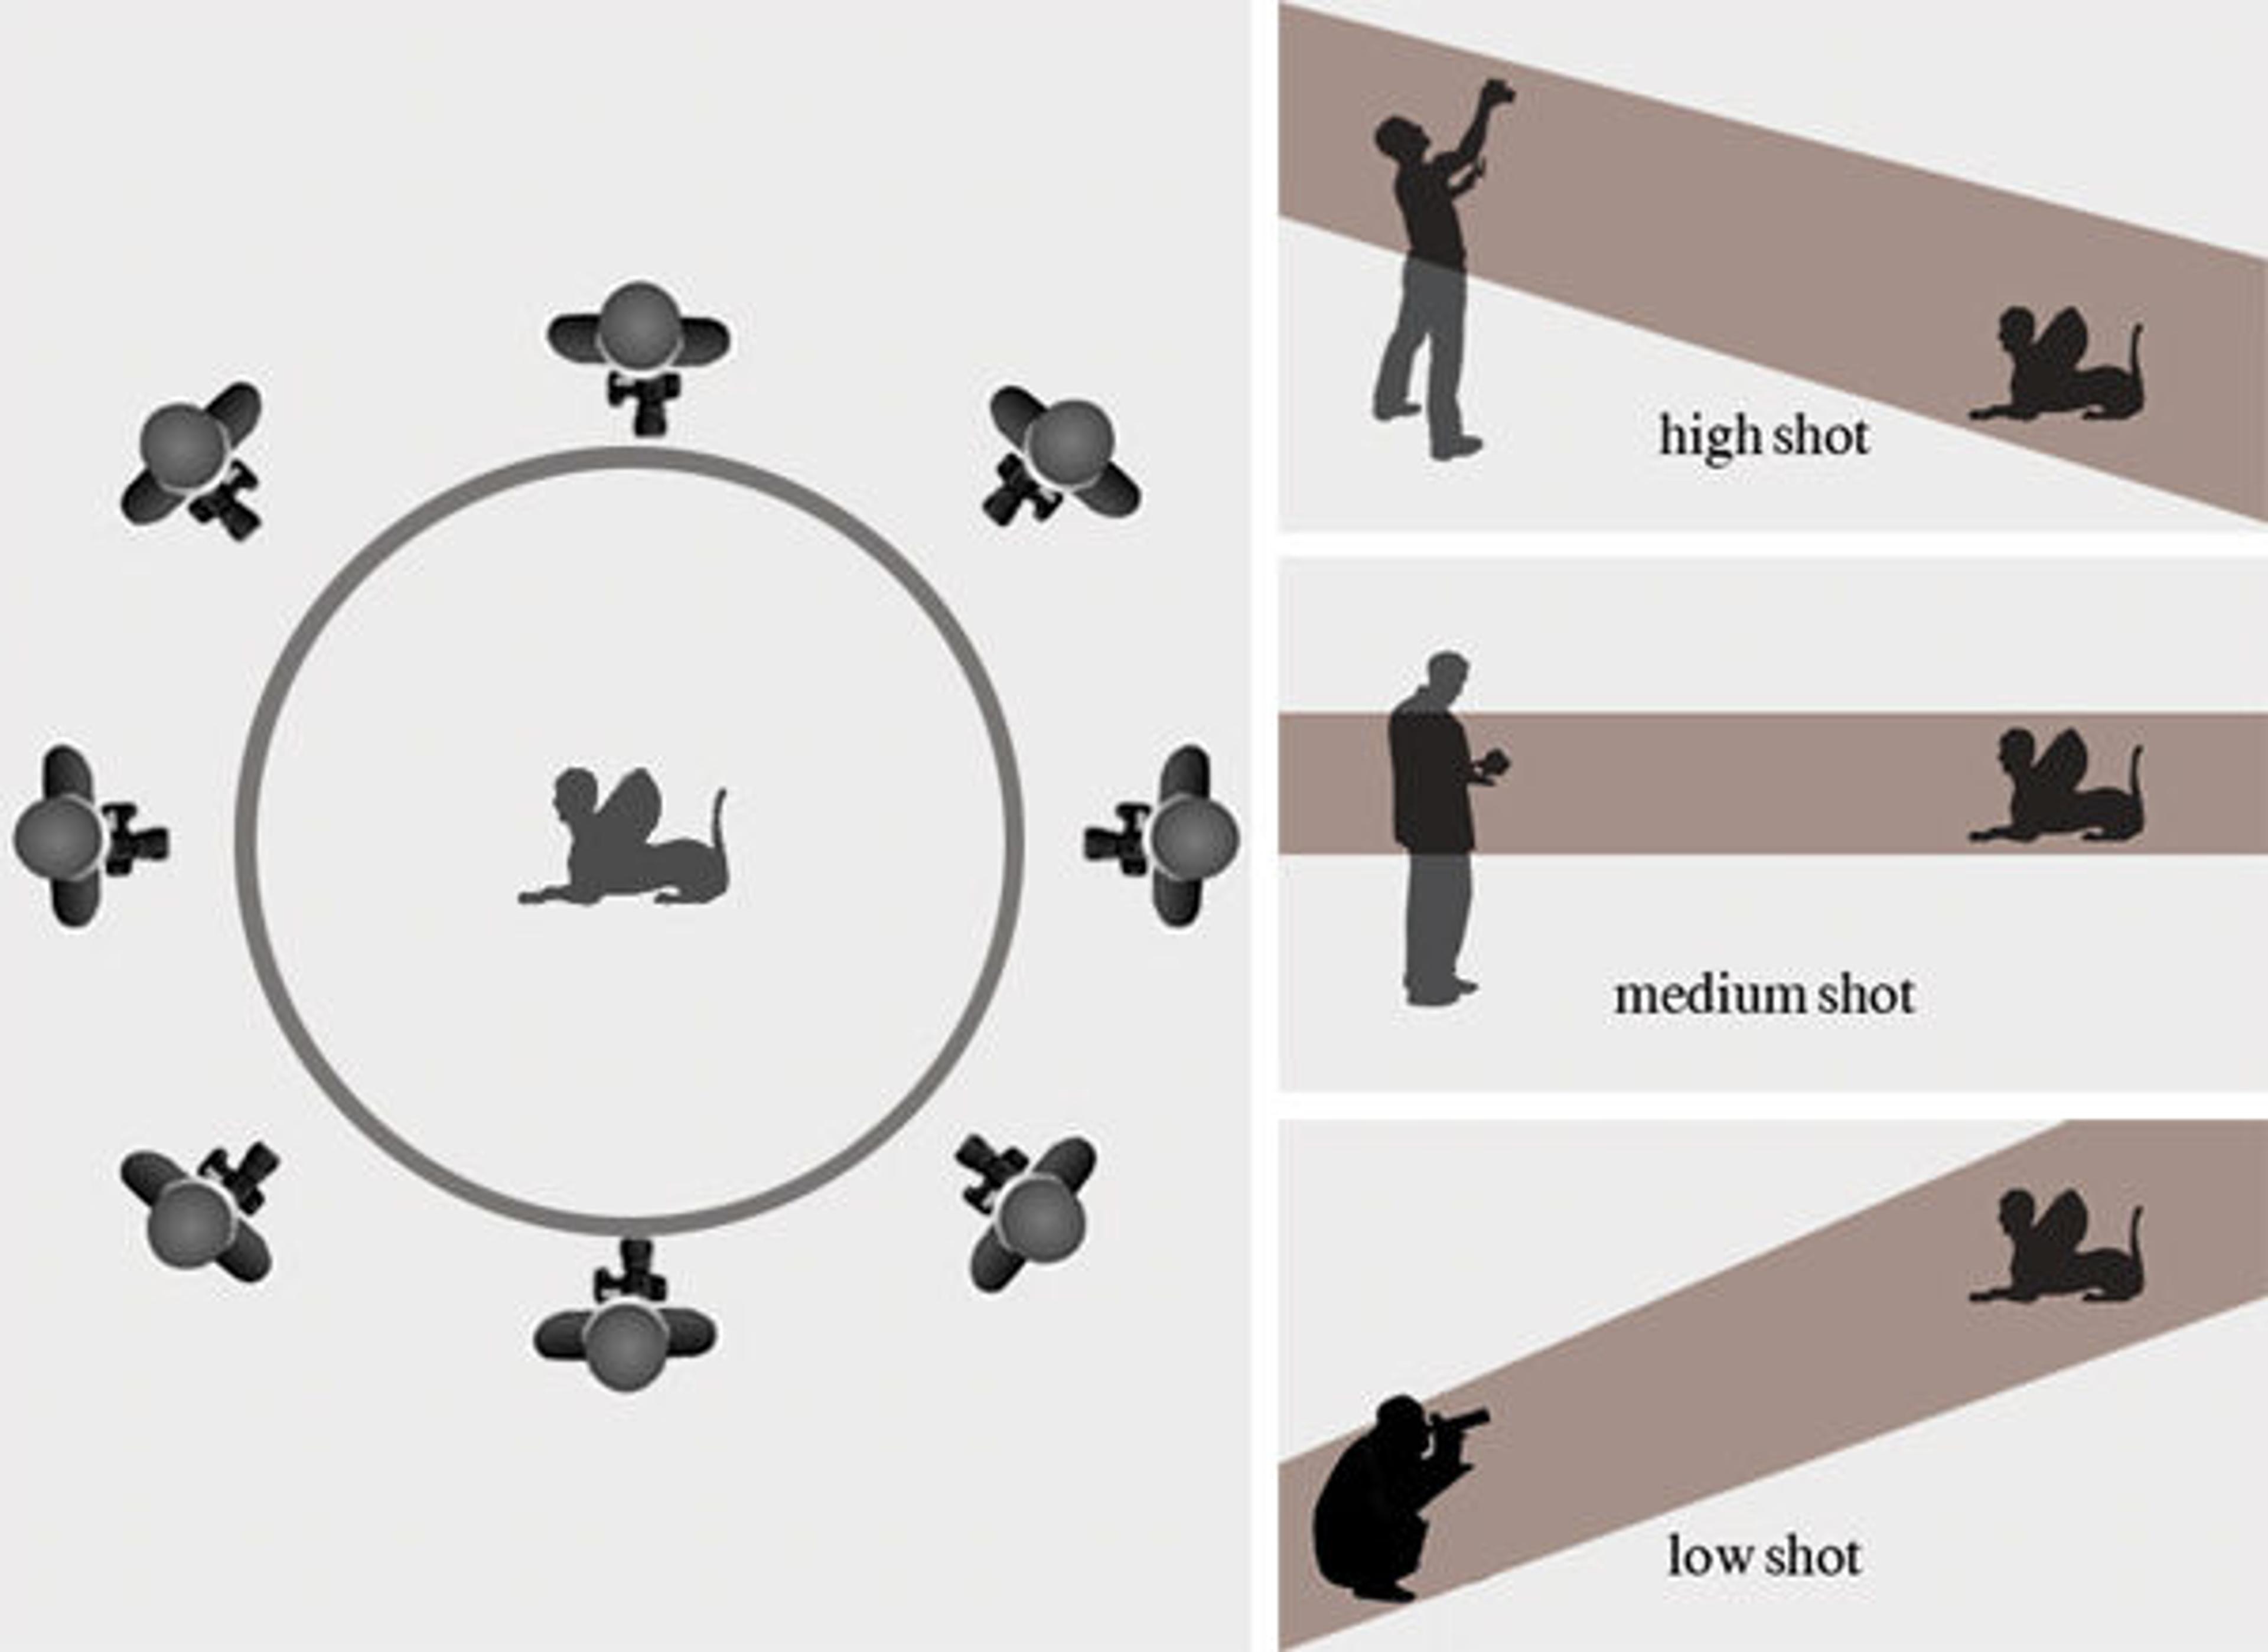
4. Take your shots. Position your camera so that the object just about fills the frame, then circle the object slowly, taking pictures from high, middle, and low positions every 30 to 45 degrees or so. You should end up with anywhere from twenty-four to thirty-six pictures. Remember to have your spotter keep an eye on you as you move around the object so that you don't bump into people or other works of art.
Circle the object and take pictures from high, medium, and low angles. Diagrams courtesy of Yang Jiang
Make sure that your flash is off; flash photography is disturbing to other visitors, and some objects are very sensitive to light. (At the Metropolitan, the use of flash is prohibited at all times and in all galleries.) Besides, flash photography will confuse the photogrammetry software, which expects a uniform lighting source.
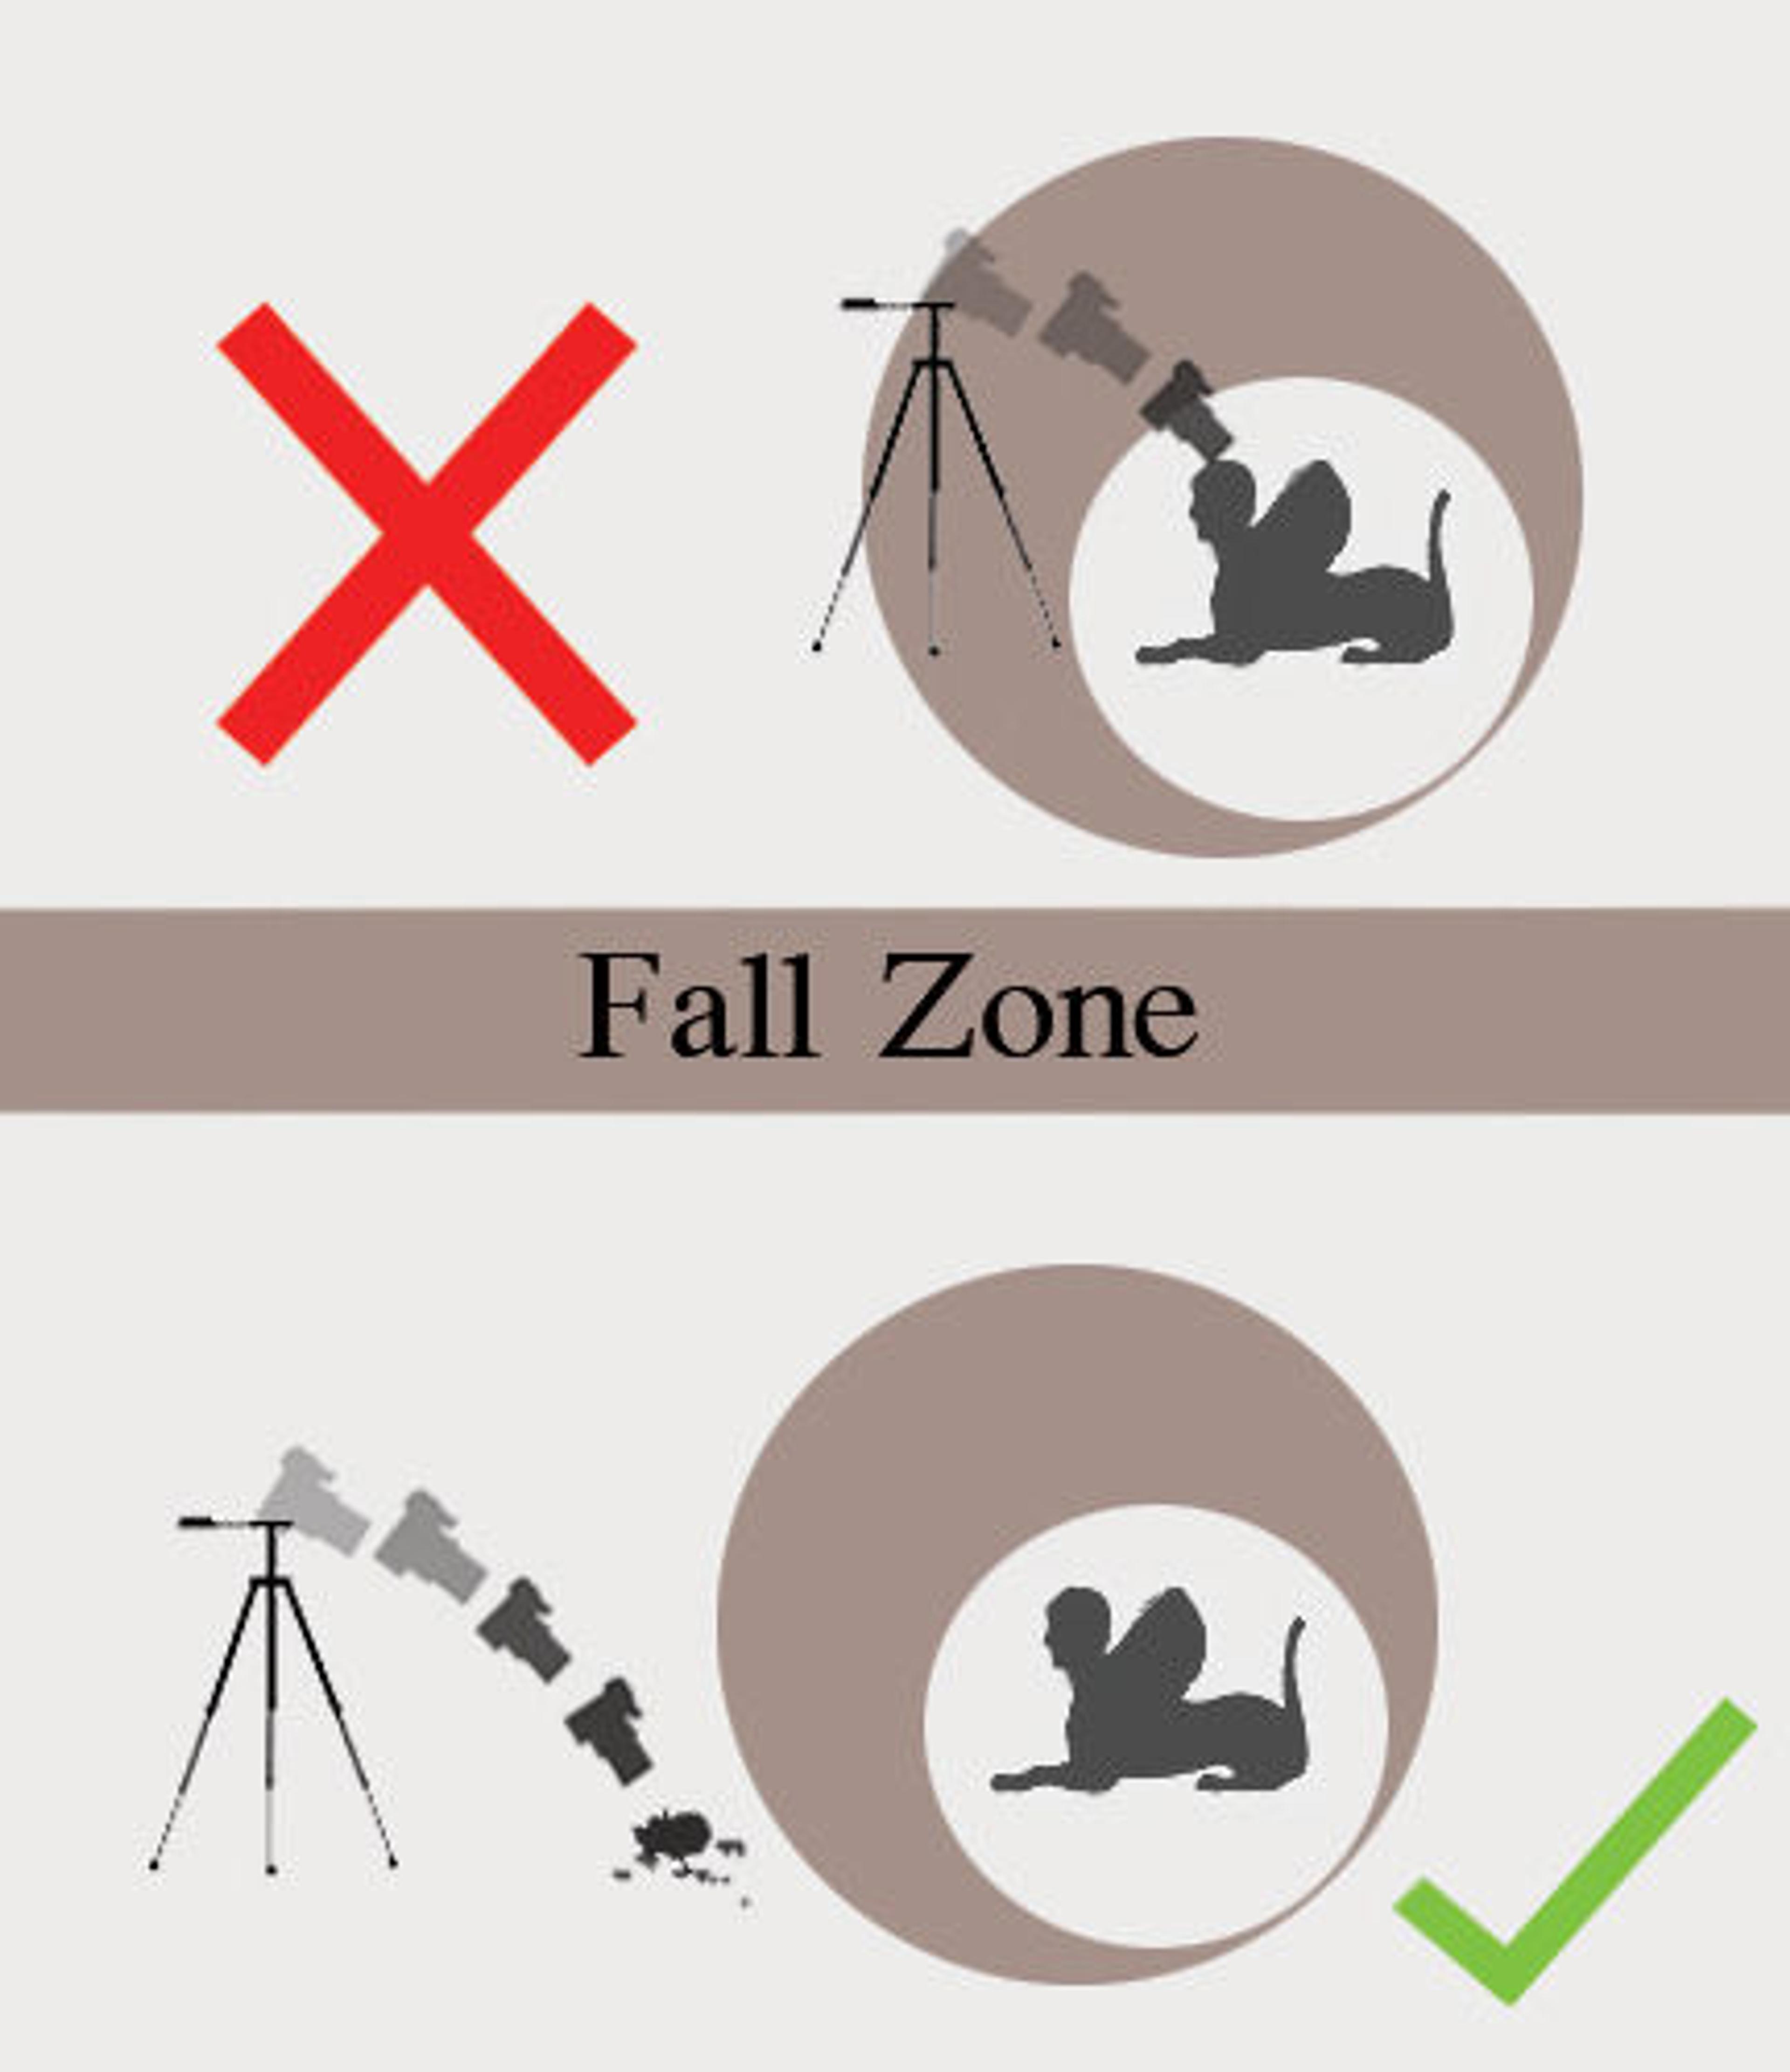
Try to get shots in which the entire object is in focus, but be careful to avoid the "fall zone," the area in which—if you were to drop your camera or knock over your tripod—your equipment would fall and hit the object. To stay out of the fall zone, never hold your camera or position your body above the object, and keep your tripod at least one tripod-length away.
Avoid the "fall zone" in case you, your camera, or your tripod takes a tumble. Diagram courtesy of Yang Jiang
5. Be prepared to explain what you're doing. Museum guards may not be used to seeing this kind of photography practice, and they're trained to be suspicious of new activity around the objects. If a guard asks you what you're doing, just explain what you're up to and appreciate that he or she is simply protecting the art.
You might also find that museum staff or other visitors approach you with questions about what you're doing or why you're so interested in that particular object. Think of yourself as an ambassador for new technology. You might open some minds, make some friends, or if you're lucky, meet an expert who will teach you something special about the object you're photographing.
Once you're done photographing your object, upload your images into 123D Catch and see how you did! Leave a comment below if you have questions or run into any problems, and we'll try to help you out.
Related Link
3D Scanning, Hacking, and Printing in Art Museums, for the Masses
Don Undeen
Don Undeen was formerly the senior manager of MediaLab in the Digital Department.