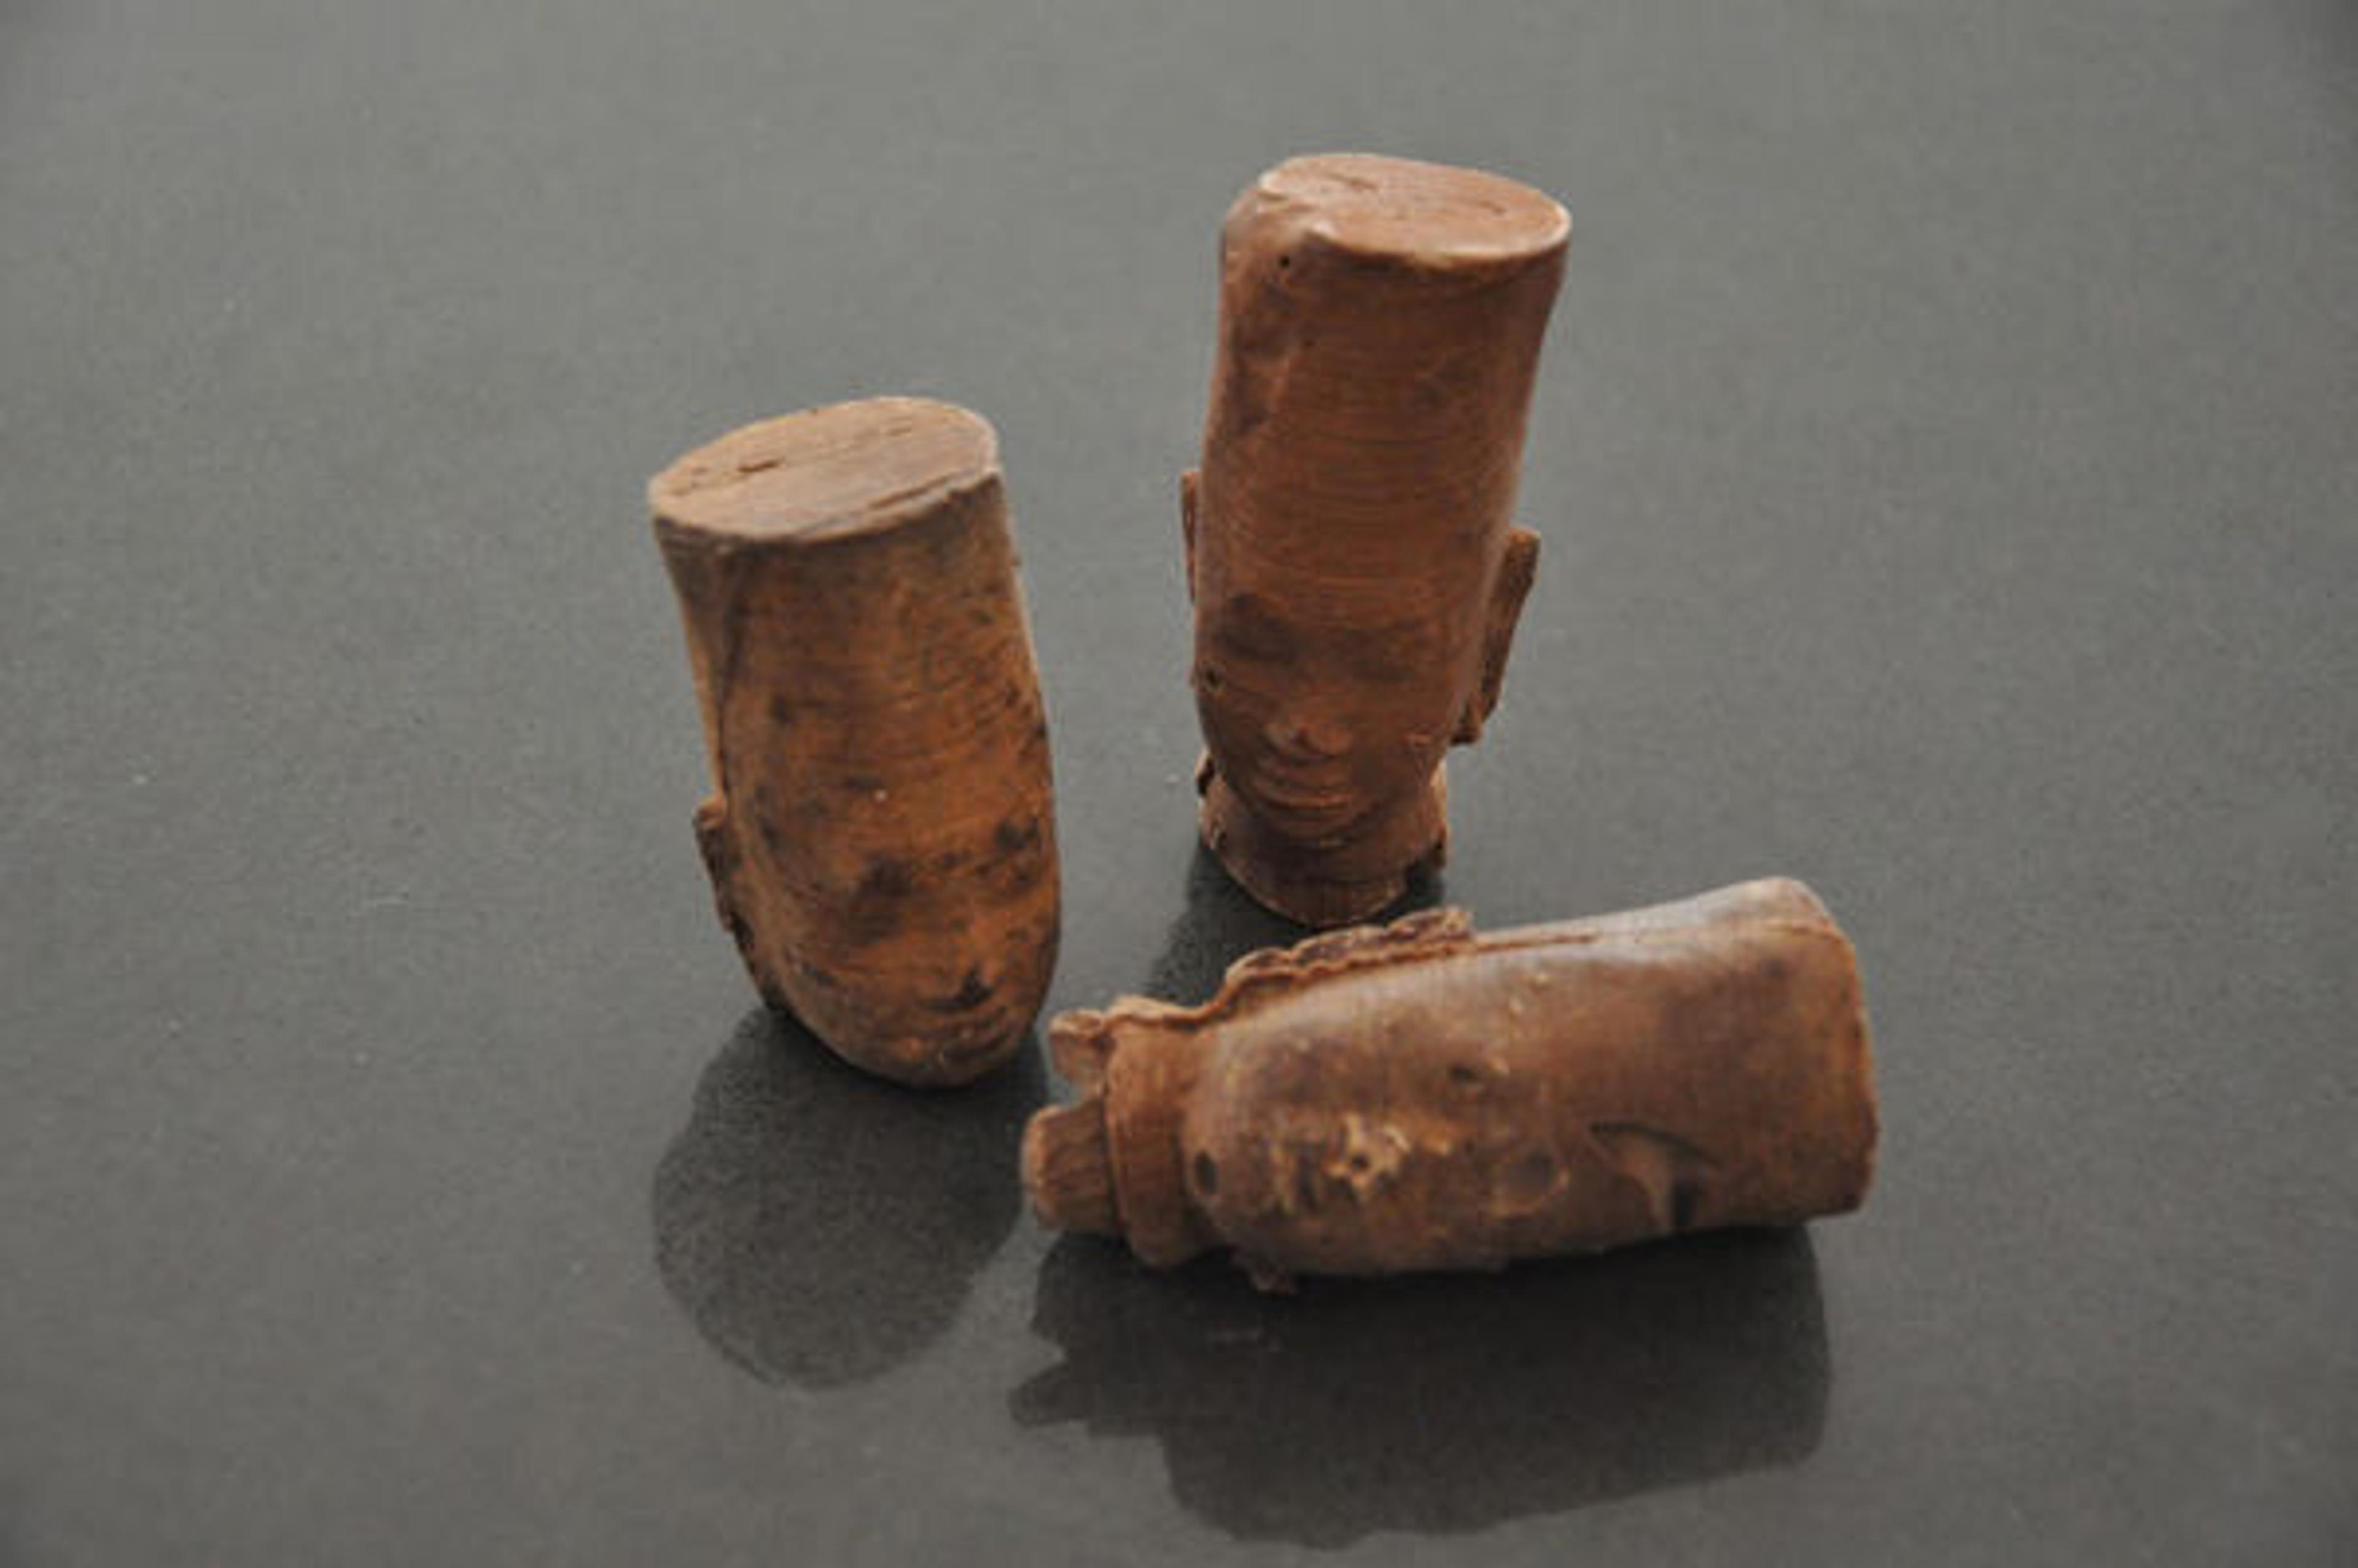
The head of a standing female deity, probably Durga in the form of chocolate castings. Images courtesy of the authors
From Don Undeen, Senior Manager of MediaLab:
«For our MediaLab internship during the fall 2014 semester, Yuanjin and I collaborated to create Edible Met, a DIY food-grade molding and casting kit that turns 3D-printed objects into edible items.»
We were interested in creating a multisensory experience so that our visitors can touch, smell, and even taste artworks in the Museum. We believe visitors can develop a deeper understanding of the structure of an artwork if they can experience it with all of the senses. We also think it's easier to pay close attention to the details of an object during the process of replicating it, which can inspire our visitors to acquire more background information about the work.
After researching various types of 3D food printers, including Foodini, ChefJet, and Candy, we realized that even though most 3D food printers cost thousands of dollars, the results are not always very satisfying. Some printers basically function as automated squeeze bottles, squeezing out food puree layer by layer. So we looked at ways to make 3D edible objects other than by using a 3D food printer, and as a result, we settled on a more traditional approach: molding and casting.
A mold is a hollow form that is filled with a liquid or pliable material to create a decorative shape. As the material hardens, it sets inside the mold and adopts its shape. Since we were making edible objects, the mold's material had to be food grade. Luckily, we found ComposiMold, a food-grade, reusable heat-and-pour mold-making material that can be melted and reused over thirty-five times. After receiving some good advice from 3D-printing and mold-making expert Steven Fragale, we began to make our first batch of food-grade molds.
Mold Making
We started by downloading 3D models from the Met's Thingiverse page, loading them into the 3D-editing program Tinkercad for final touch ups, and printing them out using 3D Systems' CubePro 3D printer at the MediaLab.
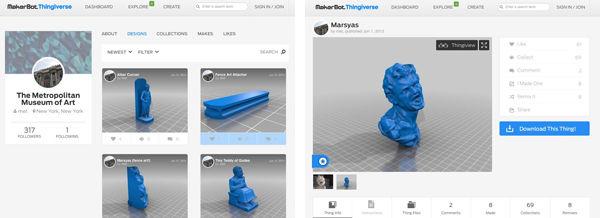
Screenshots of the Met's Thingverse page featuring 3D versions of Met artworks that were scanned by MediaLab staff members and volunteers using photogrammetry and handheld 3D scanners
We then melted down the ComposiMold using a microwave and placed a 3D-printed object into a container so that we could gently pour the ComposiMold over it. Rather than pouring the molding material directly on top of the 3D-printed object, we poured it near the inner edges of the container in order to prevent bubbles from forming.
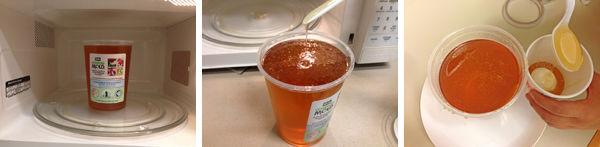
Left: ComposiMold placed in the microwave. Center: Melted ComposiMold fresh out of the microwave. Right: Melted ComposiMold poured around the edges of the container containing the 3D object
After the ComposiMold hardened, we removed it from the container and cut the mold we created into two halves using an Exacto knife. Finally, we carefully removed the 3D object, and the mold was ready to use for casting.
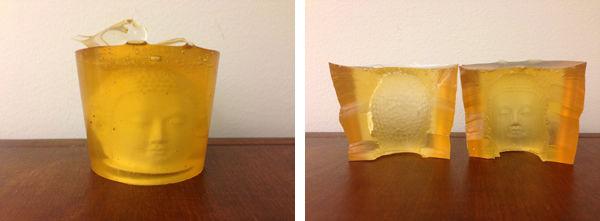
Left: The ComposiMold mold hardened around the 3D object. Right: An inside view of the two halves of the mold with the 3D object removed
Sweet Art
We experimented with sweets and pastry during our first round of prototypes by using chocolate and cookie dough. Making molds and casts is relatively common in the pastry world, so we were able to locate a decent amount of information and tutorials. We chose to work with chocolate for our first quick prototype because chocolate is readily accessible and can rapidly solidify.
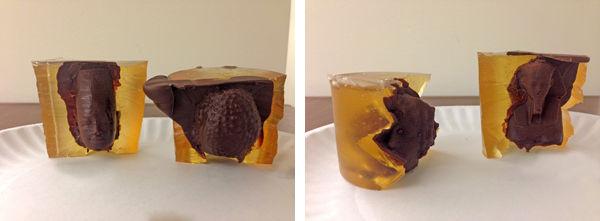
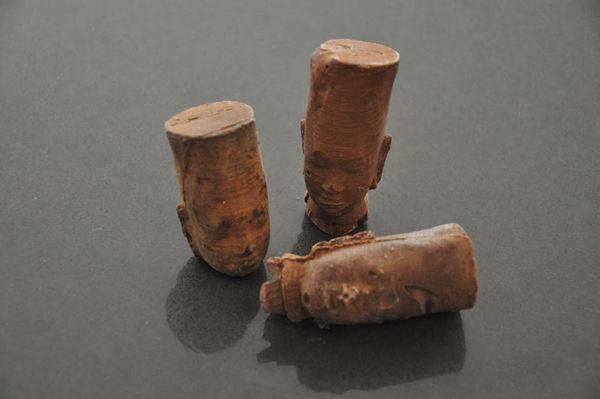
Chocolate castings of multiple 3D objects still in their molds
We tempered the chocolate using a microwave oven since it was relatively quick and easy compared to the conventional double-boiler method. After testing various kinds of chocolates, we realized that unsweetened dark chocolate containing 70% cocoa or more worked the best. Before pouring the melted chocolate, we coated our molds with vegetable oil to prevent the chocolate casting from getting stuck to the mold. The result was quite satisfying; the chocolate castings kept most of the detail of the original 3D objects.
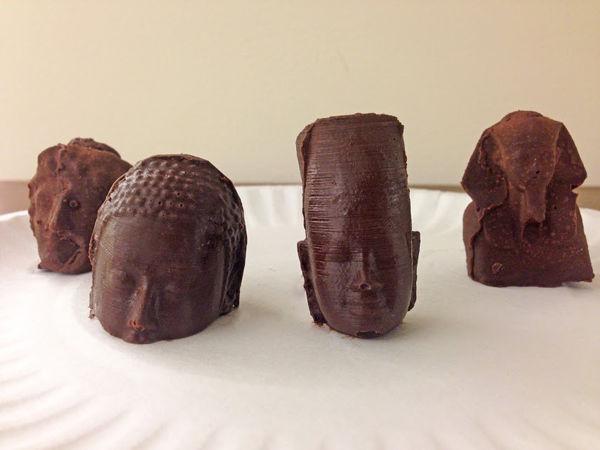
Chocolate castings that retained many details of the original objects
After our first success with chocolate, we experimented with cookie dough, and since our molds were soft and flexible, they worked very well with the dough. Unlike our experience with chocolate casts, which need to solidify inside the mold, we were able to produce a large amount of cookie castings with only one mold. However, the details of the cookie castings were not as precise as those of the chocolate ones. Working with cookie dough also allowed us to experiment with different flavors, so we made chocolate-, vanilla-, and green tea–flavored cookies that were shaped like Balthasar Permoser's Marsyas.
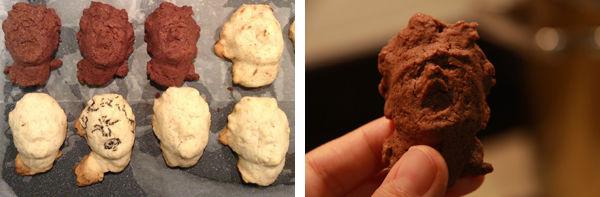
Left: Vanilla and chocolate Marsyas cookie castings. Right: Close-up of a chocolate Marysas cookie casting that is much less detailed than the chocolate castings.
A Meal
Inspired by Dieter Roth, a Swiss artist best known for his works made of biodegradable materials such as meat and cheese, we experimented with various edible materials in our second round of prototypes and produced castings using ground beef, cream cheese, rice, and banana. We imagined that the final result could be served as a meal and presented together on a plate.
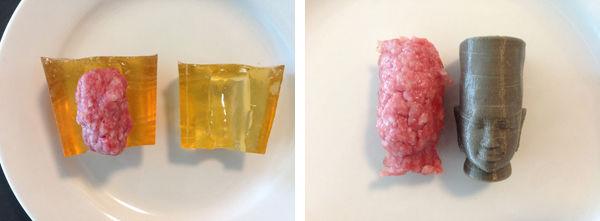
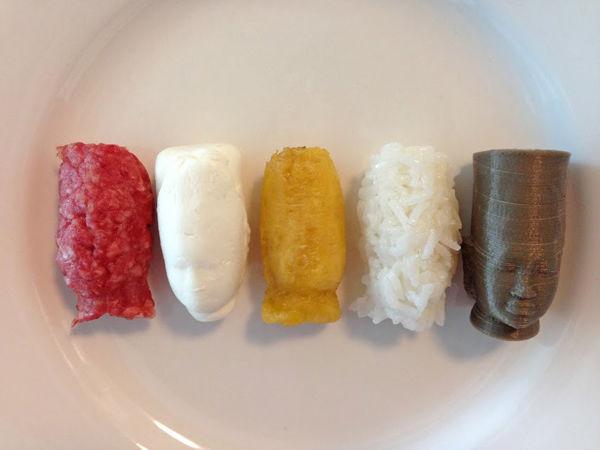
Top, left: Ground beef in the first half of its mold. Top, right: The ground beef casting next to the original 3D object. Bottom: The original 3D object on a plate (at far right) with its ground beef, cream cheese, rice, and banana castings.
DIY Kit
We wanted our audience to be able to produce their own 3D-edible artwork and enjoy the process. Once we found the best method for turning 3D-printed objects into edible items through molding and casting, we designed and produced a DIY food-grade molding and casting kit for the final prototype.
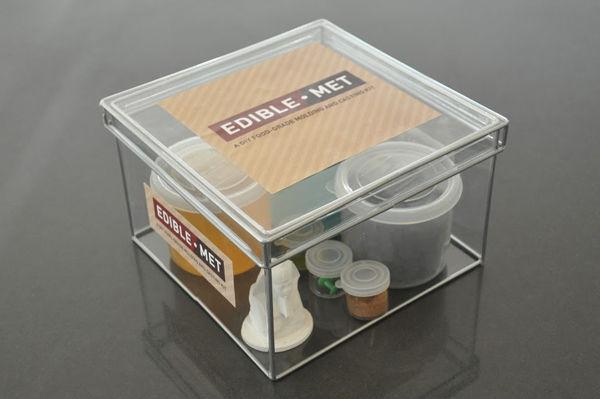
The Edible Met DIY food-grade molding and casting kit in its packaging
The kit provided all of the materials needed to make custom food-grade molds and chocolate castings. It included ComposiMold, 3D-printed objects, a reusable mold holder, chocolate chips, push pins (for securing the object inside the holder), vegetable oil, and spices. The vegetable oil is used for coating the mold while casting, and the spices were included to encourage experimentation with different flavors.
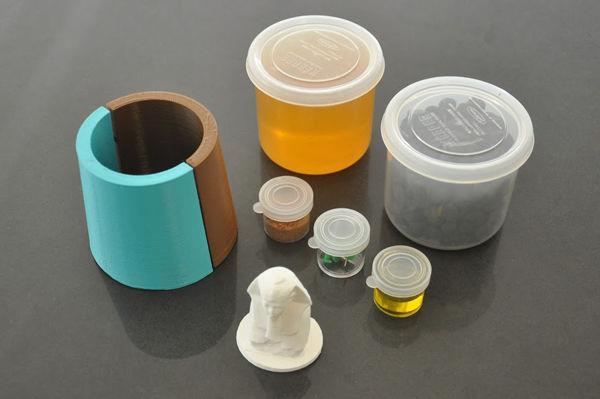
The reusable ComposiMold, chocolate chips, reusable mold holder, spices, push pins, vegetable oil, and 3D object that comes with each Edible Met kit.
Since ComposiMold can be reused up to thirty-five times, the user can keep remelting and producing new molds. All containers included in the kit were microwave safe so that the user could simply heat up the molding material and chocolate in a microwave oven. The kit also comes with step-by-step written instructions.
Future Iterations
The Edible Met DIY kit is not just for producing chocolate castings; we see a lot of possible edible applications for it. Future iterations of the kit could include different edible materials that are easy to work with and have a good shelf life. We want to continue the experiment by adding food flavoring so that each edible item has a unique flavor that relates to the artwork's story. We also want to establish an online platform where users can download and exchange 3D models and we can provide video tutorials on how to use the kit with different types of edible materials.
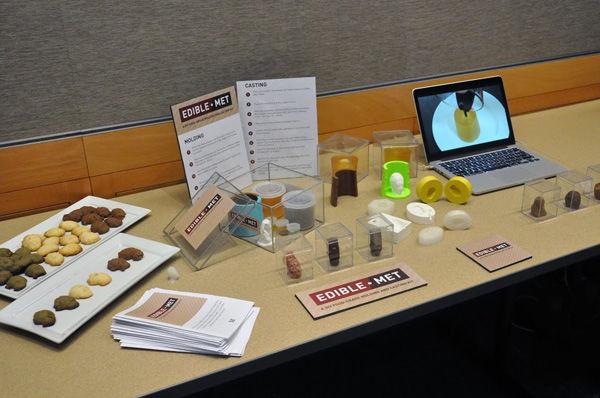
Edible Met at the fall 2014 MediaLab Expo
Which Met artwork do you want to eat and what do you think it should it taste like?
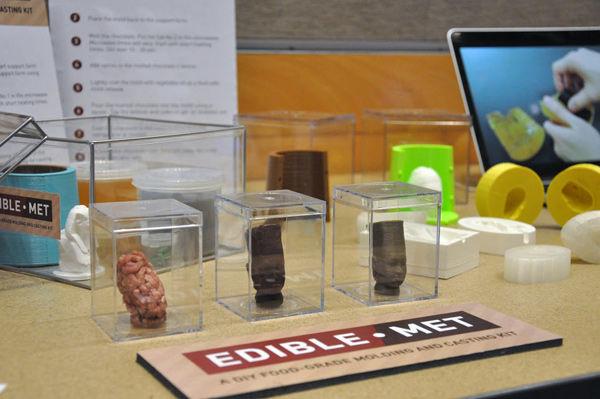
Two castings and the original 3D object on display at the fall 2014 MediaLap Expo